A buyer sent a photo of a wooden wall shelf from a competitor's catalog and asked, "Can you make this?" The factory could, but the photo didn't show the back construction, the wall mounting method, or the exact wood type. Three rounds of emails later, the buyer clarified: birch wood, keyhole mounting, 60cm wide, satin finish. Those four details would have saved a week if they'd been in the first message.
Sample development is the most important phase of any custom wooden craft project. The sample becomes the quality contract between buyer and factory. How well the sample process goes determines how smooth the bulk production will be. This guide covers the step-by-step process from first contact to approved sample.
Step 1: What the Buyer Sends
The sample process starts with what the buyer provides. Each input type has different strengths:
- An idea or description — "I want a wooden box for candles, something rustic." The factory develops the design. This works but requires more back-and-forth.
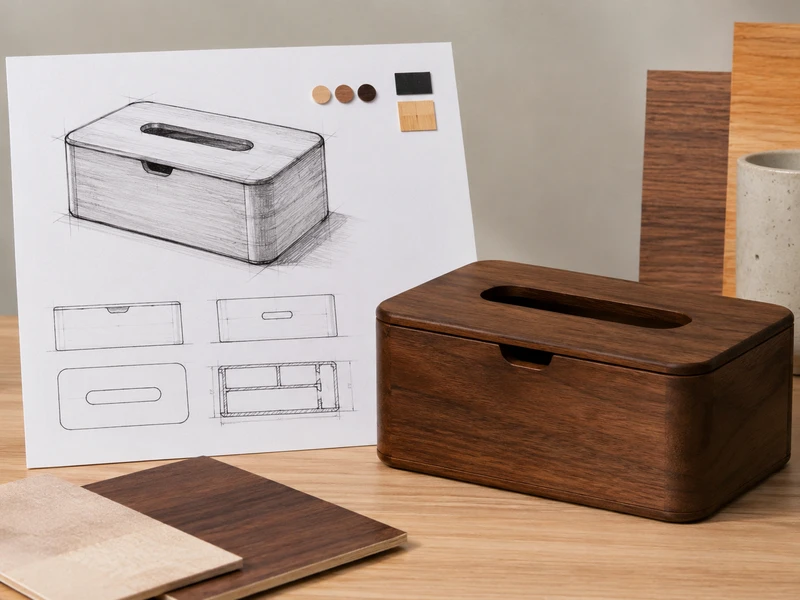
- Reference photos — images of existing products. Multiple angles help. Include a ruler or known object for scale. Note what you want to keep and what you want to change.
- Hand sketch — a drawing with measurements. Perfectly acceptable. The factory creates technical specifications from the sketch.
- CAD file or technical drawing — AI, PDF, DWG, STEP. The fastest path to an accurate sample. The factory can start immediately.
- Physical sample — send by courier. The factory reverse-engineers it. Best for matching an existing product exactly.
Step 2: Factory Feasibility Review
After receiving the buyer's input, the factory evaluates feasibility. This includes checking:
- Can the design be produced at the target quantity?
- Is the chosen material suitable for the design and finish?
- Are there any fragile or difficult details that need modification?
- What production method is best — CNC, laser, hand carving, or a combination?
- What is the estimated cost per piece?
A good factory communicates feasibility concerns early, before sampling begins. If a design detail will cause problems in bulk production, it's better to modify it at the sample stage.
Step 3: Material and Structure Confirmation
Before making a sample, confirm:
- Wood type — pine, beech, birch, bamboo, MDF, or other. Each has different characteristics.
- Thickness — 3mm, 5mm, 10mm, or custom. Affects weight, strength, and cost.
- Structure — for boxes: lid type, hinges, closures. For ornaments: hanging method, base type.
- Dimensions — exact measurements or acceptable tolerances.
Step 4: Size, Finish, and Logo Confirmation
Confirm the visual details:
- Finish — natural, stained, painted, distressed, lacquered. Send Pantone or RAL references for painted finishes.
- Logo — method (engraving, printing, stamping), placement, and size. Send the logo in vector format.
- Interior — for boxes: lining type, insert shape, compartment layout.
- Packaging — individual wrapping, branded box, hang tag, or retail-ready packaging.
Practical Example: From Photo to Sample
A gift brand sent three photos of a wooden keepsake box from a trade show — front, side, and open view. They noted: "Similar size (approximately 15×10×7cm), but with our logo on the lid, magnetic closure instead of clasp, black velvet interior, and beech wood." The factory created technical drawings in 2 days, produced a sample in 8 days, and the buyer approved with one minor adjustment (magnet strength). Total time from first contact to approved sample: 14 days.
Have a product idea, photo, or drawing? Send us your reference, material preference, size, finish direction, logo details, and quantity. We will review feasibility and produce a sample for your approval — detailed quote within 24 hours.
Start Your SampleStep 5: Sample Production
The factory produces 1-3 samples based on confirmed specifications. Sample lead time is typically 7-15 working days depending on complexity. During sample production, the factory may send progress photos for early feedback.
Step 6: Sample Checking
When the sample arrives, check it thoroughly:
- Measure all critical dimensions against specifications.
- Check finish color under natural light — artificial light changes how colors look.
- Test all moving parts — hinges, closures, drawers.
- Check logo quality, placement, and legibility.
- Assess weight and overall feel.
- For boxes and trays: test with your actual products.
Step 7: Modification Before Bulk Production
If the sample needs changes, communicate clearly:
- Use photos with annotations — circles and arrows pointing to what needs to change.
- Provide specific measurements — "move the logo 5mm to the left" is actionable. "Move the logo a bit" is not.
- Limit to 1-2 rounds of modifications — each round adds 5-10 days.
- Approve in writing — send a clear confirmation email stating the sample is approved for production.
How Good Communication Reduces Production Risk
The biggest production problems come from unclear sample communication. When the sample is approved, it becomes the quality standard. If you approved a sample with a slightly off-center logo, the bulk order will have off-center logos. If you approved a sample with a loose hinge, the bulk order will have loose hinges. Inspect carefully and communicate clearly before approving.
FAQ
How much does a sample cost?
$50-150 per design depending on complexity. Sample fees are typically refunded against your first production order of 500+ pieces.
How long does sample development take?
7-15 working days from confirmed specifications to shipped sample. Simple products (flat ornaments, basic boxes) are faster. Complex products (multi-component boxes, 3D figures) take longer.
Can I get a sample before confirming specifications?
We need confirmed specifications before making a sample — otherwise the sample may not match your expectations. We can send material samples (wood type, finish color) for free before starting the product sample.
What if I need to modify the sample?
1-2 rounds of modifications are normal and included in the sampling process. Each modification round takes 5-10 additional working days. Be specific with feedback to minimize rounds.
Related Resources
Explore our custom wooden crafts, laser-cut wood products, and manufacturing capabilities pages. You can also read our guides on what to prepare before OEM manufacturing and working with an OEM factory.